Cinnamon iOS Project Template
Hana Spolador
2022-09-01
8min
Development
Before delivering a project, developers worry about their tech stack. By creating a template, we hope to speed project start-up and standardize lifecycle processes.


Share this blog:
Template Overview: How to Setup and Use
iOS Project Template – The idea
We are always on the lookout for tools and solutions to make our development processes more efficient and to always keep them one step ahead.
We’ve noticed that the majority of our projects have similar screens and organization. Each time when we would start out with a new project, we would find ourselves working on a group of time-consuming and not-so-interesting tasks from scratch. These repeating tasks would include registration, login and sign-up flows, the account screen, scrollable screens, tab views, etc. They would often have similar logic and code organization with minimal changes.
Aside from handling these repetitive tasks at the start of a new project, there’s also the question of how to efficiently maintain code consistency between multiple projects. A similar set of questions will always come to a developer’s mind when starting a new project – What technology stack to use? Which architecture would be best to use? How should we implement networking? How should we organize the code?
Answers to all of these questions should be a part of the accepted team standards and practices – a joint decision of all team members. But how should we effectively enforce and maintain these team standards?
Instead of spending too much time on guiding each developer on how the code should be written to conform to our standards, it would be more efficient to have some kind of a universal project that will include essential screens and functionalities for when starting a new project. These would conform to our accepted team standards and practices.
So how do we create some universal standards in our team if everyone has their own way of coding? As a team, we encourage everyone to share their ideas and partake in discussions during our weekly meetings. We decided we needed a way to speed up creating new projects without getting stuck in a loop of rewriting the same code – and a way that would at the same time help us to standardize lifecycle processes.
That’s when we came to the idea of creating our own custom template.
After finding the initial idea, we continued to build our template step by step. Each of the team members contributed and made improvements. Creating the template was an iterative process. It’s already been through multiple versions, and we’ll certainly continue to add to it and polish it with each new update.
Why use a project template?
As we’ve already mentioned, using a custom template will help the team to speed up new project configurations and enforce certain standards and practices. No matter how big or small a project is, it can benefit from using a template. The template reduces writing boilerplate code and serves as a starting point for creating new projects – without having to start from scratch each time. It’s a great way to save time and effort that might otherwise be needlessly lost on repetitive tasks.
What are Xcode Templates?
If you’ve ever created a new Xcode project, chances are you did so by using one of Xcode’s default templates. Xcode templates are a great tool for creating reusable project outlines to give developers a better starting point when creating new projects or files. The templates determine what will be automatically created inside a brand new project. For example, that could be a blank view with a “Hello, Word!” text, a setup code for Core Data, an ARKit scene or many other things.
Aside from these default templates, Xcode also allows the developers to create their own custom templates. This is how our custom Cinnamon iOS template was brought into being. There are two types of Xcode templates: project and file templates. Project templates create the skeleton of a whole project, together with various files, while the file template adds files to an existing project. The main focus of this blog is the project template.
Template’s tech details
Let’s move on to the more technical details – how exactly is our template implemented and how is it organized?
The template uses the latest iOS tech stack – iOS 15.4 and SwiftUI. It follows the MVVM (Model-View-View Model) architecture.

Screens:
Screens are organized into modules, where each screen has its own view model, an injected networking service, and also views and models that are used only within that module.

Our iOS template is wrapped around async/await networking. The template provides base functionalities as well as example screens for login screens and screens with lists. Example screens serve as blueprints for creating a new similar screen. After using what’s needed from the example screens, they can be deleted.
Localization:
It’s always a good practice to extract your strings in a separate file. But if you’re already separating them, it’s even better to create a Localizable file right from the start. This way your app is already prepared to support multiple languages in the future – without any additional effort.
Utils:
The Authorization folder consists of Authorization and Session Manager, to aid the management of various authentication methods like login and logout.
In the Extensions folder we keep all of our extensions in one place – to add new functionality to existing classes, structures, enumerations, or protocol types. For example, a View extension for a clean use of a font style, a String extension for checking if the string is a valid email or password, and so on.
The Alert folder consists of its model, context and a manager, all of which make presenting alerts to the user simple and painless.
Views:
This is a folder with reusable views, modifiers and styles. That includes a font modifier, button styles, text field styles, etc.
Models:
The Models folder is where we keep all of our global models like NetworkError.
Why SwiftUI?
With SwiftUI you can write less code while achieving more. It has a declarative syntax which is easy to use and learn, while being very simple, modern and clean. What’s more, even if you stumble upon something that isn't yet natively supported by SwiftUI itself, it’s not a problem because it’s compatible with UIKit. In fact, one of SwiftUI’s major strengths is just how well it integrates with both UIKit and AppKit.
Upcoming
We’ll dive into a more detailed analysis of our template’s architecture in the following blog in this series. There are also various features and upgrades that will hopefully be coming soon to our iOS template. That includes implementing the networking layer using async/await – which is currently only mocked up.
For now, let’s move forward into how to configure and use our template.
How to use our template
Our template is free to use and you can head over to our GitHub repo to download it:
https://github.com/Cinnamon-Agency/template-ios
In order for the downloaded template to be visible inside Xcode when creating a new project, we need to transfer the .template file to the appropriate directory – so that Xcode can find it.
To do that, position inside the project folder and simply run the following command:
make installIf you’ll want to uninstall it later on, just run:
make uninstallIn case you wish to install the template manually instead, download the repository and place its contents in: ~/Library/Developer/Xcode/Templates.
After you’ve successfully completed the previous step, the project template should be visible when creating a new project (Cmd+Shift+N), under the “Cinnamon – Project Templates” section:
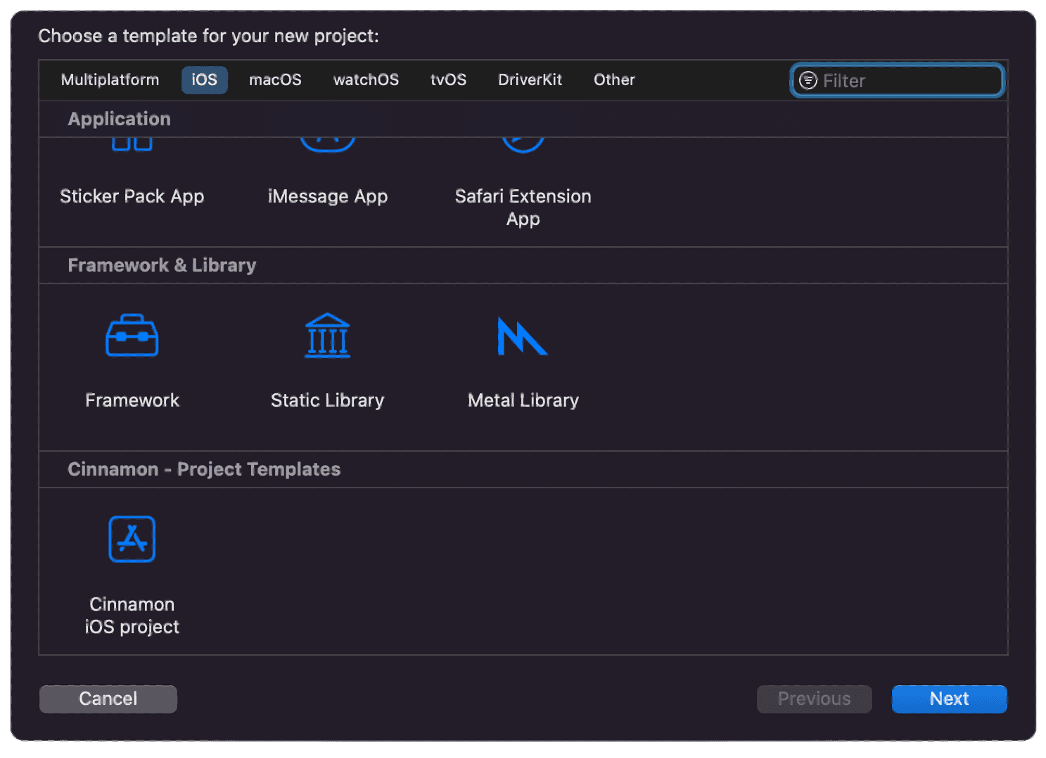
Select our Cinnamon iOS project template and tap on Next. After you’ve filled out the project information, click on Next once again and select a desired project folder – and the project should be successfully created!
You should see the following:
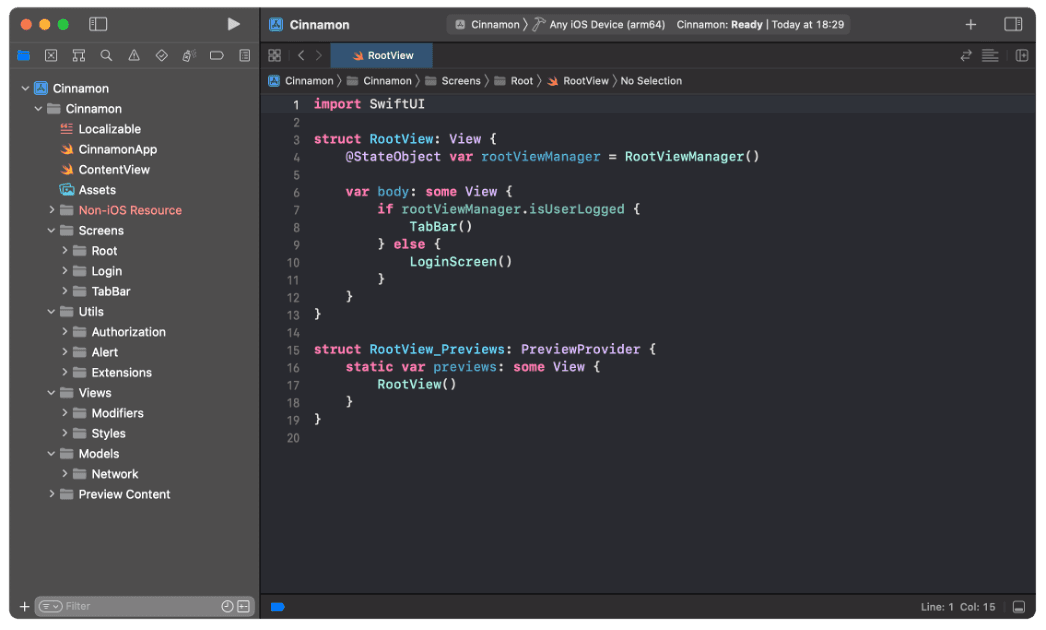
You can go ahead and delete the “Non-iOS Resource“ folder, as you won’t be needing it.
If you try to build your project right away, you won’t be able to do so because you’ll first need to add the KeychainAccess package dependency. It’s a simple Swift wrapper for Keychain which makes using Keychain APIs extremely easy and much more palatable to use in Swift. The easiest way to add dependencies is with the Swift Package Manager.
Other than that, we suggest you install SwiftLint, an open-source tool to enforce Swift styles and conventions. It allows you to set coding style rules and force them during development.
One last thing you'll need to do is to delete the ContentView file and replace ContentView with a RootView in @main class.
After you’ve done that, you can run the project.
And that's it, you're all set! Now you can use our project template and continue building on it to fit your project’s needs.
Roadmap
We’ll have a series of blogs relating to our template, in which we’ll do a more in-depth analysis of the template, discuss our decisions more in detail, as well as show you how to create your own template. In parallel, while releasing blogs tied to the iOS team, you can expect blogs and templates from our Web, Flutter, and Android teams.

Share this blog:
Subscribe to our newsletter
We send bi-weekly blogs on design, technology and business topics.